1956 Pontiac Spring Removal and Installation.
by Larry Gorden
Graduate, Pontiac Motor Division "Advanced Vocational Training Course", Shawnee KS, 1962
December 20, 2006
This is how I removed and installed front springs on my 1956 Pontiac.
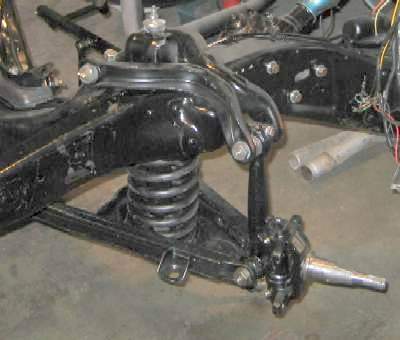
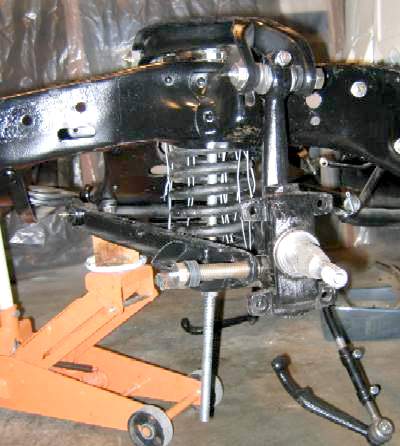
The engine was not installed in the car so I could not use the methods described in the shop manual (page 3-10) for removing and installing the springs -- which depend on the weight of the engine to compress the springs. I considered loading the front frame (with concrete blocks, or whatever) to simulate the weight of the engine but that seemed like too much manual labor and doing it that way is not easy and a bit dangerous, especially when it comes to reinstalling a spring. I was installing thick rubber washers on top and bottom of spring (used on Cadillac and Oldsmobile) which would make it virtually impossible to reinstall the spring using that method.
I needed a tool for compressing the springs so I tried a couple of spring compressors; they would not work and I broke one of them trying. It was time to try something else so my mechanical engineer friend and I worked out a plan. It looked like I could run a threaded rod from upper frame surface to lower swing arm, tighten it down and compress the spring, unhook the steering knuckle support, and lower the swing arm by loosening the threaded rod -- thus allowing the spring to be decompressed and removed. The threaded rod becomes my spring compressor.
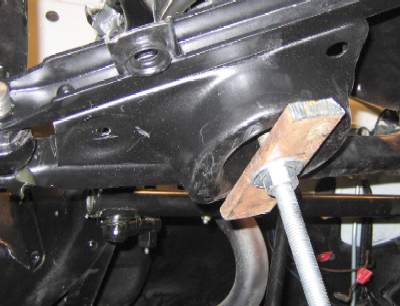
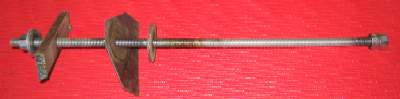
I bought a 2-foot 5/8 inch threaded rod, three nuts (one for lock nut), and 2 washers at Lowes Home Center to use as a spring compressor. I removed the shock and the upper shock mounting bracket. I cut out a piece of steel plate that fit over the hole in the upper frame where the shock was mounted and drilled a hole in it so the 5/16 rod would fit though. This is looking down at the steel plate with the threaded rod inserted, washer and nut.
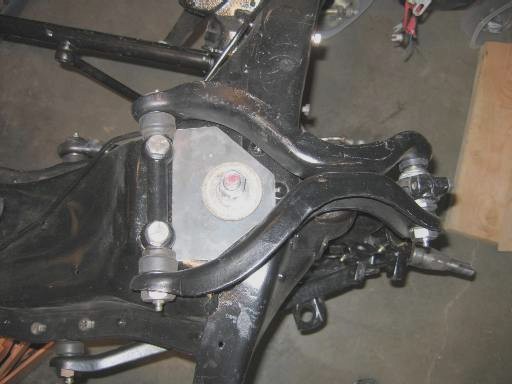
For the bottom, here's what I did -- as viewed from bottom of lower A-arm.
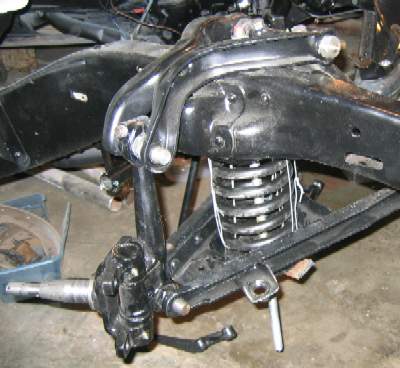
It worked well! I got the springs out. This technique seems safer than using the jack method outlined in the shop manual. The threaded rod suffered some thread damage during spring decompression but not bad. It was still usable for putting it back together.
Rebuild front end here (that's another story!), fast forward three months...
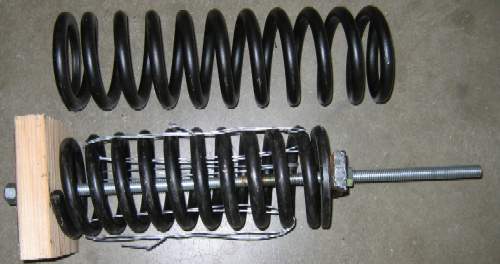
To reinstall, I compressed a spring using my "spring compressor" (threaded rod) with "washers" on each end of the spring (shown below). The "washer" on the right is the steel bar I used on the lower A-arm during removal (above). The "washer" on the left is constructed from pine 2x4 ("shade tree" and proud of it). With the spring compressed I wired it down in three places -- using 2 loops each of relatively heavy wire at each place. I used wire because it could be cut and easily removed once the spring was installed. I was reasonably confident that the wire would hold the springs compressed and that the wire would not break. This view gives you and idea of how much I compressed the spring before tying it down with wire. It is not a lot but enough to allow easy installation of the spring.
Now comes the scary part. Will those wires hold with the "spring compressor" removed or will they break and cause the spring to knock my head off???
Everything went fine and worked as expected/hoped. My head is still attached. But I was VERY careful handling that compressed spring.
Here the spring has been inserted and compressed with the "spring compressor". The lower A-arm is ready to be reattached to lower steering knuckle support. Removing the wire was not a problem. Whew!
My "spring compressor" now occupies a place of honor in my garage.
Patent pending.
I am not responsible for injuries to anyone as a result of using this technique!!!